Situation Clarity Check + The False Promise Test · Tools 01 & 02
Something is wrong. You have been trying to name it for weeks or maybe months. This bundle gives you the language.
The Situation Clarity Check scores your situation across 10 indicators and assigns it a named category: Difficult, Erosive, or Dangerous. Not a feeling. A framework. The False Promise Test then examines the specific commitments, reassurances, and explanations you have been given—and asks whether the evidence supports them.
Together, these two tools replace the vague sense that something is off with specific, scored evidence that it is.
What you get:
A named Clarity Score with category and interpretation
A structured audit of the promises you have been told
Your scored results become the reference point that every subsequent stage builds on
Part of the RADAR Pathway™ Framework Toolkit · Stage 1 of 5: Recognition
Designed for individual use.
All sales are final. For educational use only. Questions? info@molnarrc.com

Pattern Recognition Scan · Tool 03
Every toxic environment runs on patterns. This tool names yours.
The Pattern Recognition Scan identifies which of the eight documented behavioral cycles is operating in your workplace: the False Promise Cycle, the Jekyll & Hyde Loop, the Isolation Play, the PIP Trap, the Loyalty Test, the Cover-Up Spiral, the Retaliation Sequence, or the Confidence Erosion Cycle.
Naming the cycle is not a small thing. It is what turns a Clarity Score into a strategy.
What you get:
A scored behavioral cycle assessment across 8 patterns
A Pattern Profile identifying your primary and secondary cycles
A compounding pattern note if more than one cycle is active
Direct links to the armor types and tools activated by your pattern
Best used alongside the Situation Clarity Check and False Promise Test (Stage 1A), but built to stand alone. Bring your Stage 1A results if you have them.
Part of the RADAR Pathway™ Framework Toolkit · Stage 1 of 5: Recognition
Designed for individual use.
All sales are final. For educational use only. Questions? info@molnarrc.com
Financial Freedom Assessment + The Armor Audit · Tools 04 & 05
You cannot make a strategic decision until you know what staying is costing you. This stage gives you two numbers: a financial floor and a behavioral cost.
The Financial Freedom Assessment calculates your Freedom Number—the minimum monthly income you need to exit your current role and sustain yourself while you pursue what is next. The Armor Audit identifies the 11 protective behaviors you have built to survive the environment: hypervigilance, over-preparing, shrinking, performing fine, loyalty performance, overworking, emotional numbing, approval seeking, isolation from allies, documentation obsession, and physical symptoms.
What you get:
Your Freedom Number with a bridge plan to reach it
Personal financial analysis: Reality Check, Debt Map, Runway Calculation, Job-Cost Inventory, Freedom Number
A scored behavioral checklist across 11 armor behaviors
Deep reflection prompts for all 6 armor types
A cycle-to-armor cross-reference connecting Stage 1 results to this stage
A total reliance score (out of 18) with interpretation
The cost of staying is not abstract. It is calculable.
Part of the RADAR Pathway™ Framework Toolkit · Stage 2 of 5: Assessment
Designed for individual use.
All sales are final. For educational use only. Questions? info@molnarrc.com
The Decision Matrix + "Should I Report This?" Framework · Tools 06 & 07
At some point, the question stops being "Is this toxic?" and becomes, "What do I actually do?" This stage is for that moment.
The Decision Matrix scores your situation across seven weighted dimensions—Financial, Health, Career, Family, Identity, Timeline, and Reversibility—and produces a structured verdict: Stay, Transfer, or Leave. The "Should I Report This?" Framework walks you through the eight questions you need to answer before deciding whether to file a formal complaint and guides you through a realistic assessment of your reporting channel options.
What you get:
- A weighted decision score across 7 dimensions with a named verdict
- A channel assessment covering 6 organizational factors
- A structured decision guide for Stay, Transfer, or Leave
- A "Write This Down First" reflection section before you report
- Specific guidance on formal, informal, and external channels
This stage does not tell you what to do. It cuts through the emotional noise so you can think clearly about what you already know.
Part of the RADAR Pathway™ Framework Toolkit · Stage 3 of 5: Decision
Designed for individual use.
All sales are final. For educational use only. Questions? info@molnarrc.com
The Exit Blueprint + The Negotiation Map + The Workplace Recon Tool · Tools 08, 09 & 10
A decision without a plan is still just a decision. This stage builds the plan.
The Exit Blueprint gives you a phased departure timeline across four phases—stabilize, prepare, execute, and transition—with specific tasks, dates, and contingency planning. The Negotiation Map identifies five strategies for protecting yourself while still employed: documentation habits, ally identification, boundary setting, energy management, and visibility management. The Workplace Recon Tool prepares you to evaluate any new opportunity before you accept it—with pre-interview research, structured interview questions, and a 90-day signal monitoring framework.
What you get:
- A four-phase exit timeline with fill-in date anchors
- A contingency plan section for when circumstances change
- Five negotiation strategy worksheets with specific action prompts
- 6 structured interview questions to use before accepting any offer
- A 90-day monitoring scorecard with Green, Yellow, and Red interpretation
This phase is the most operationally dense stage of the pathway. Work through it with your Freedom Number from Stage 2 in hand.
Part of the RADAR Pathway™ Framework Toolkit · Stage 4 of 5: Action
Designed for individual use.
All sales are final. For educational use only. Questions? info@molnarrc.com
The Recovery Roadmap + The Red Flag Checklist · Tools 11 & 12
Leaving is not the end. The work that follows is its own stage, and it requires its own plan.
The Recovery Roadmap gives you a phased framework for the first 30 days, the first 90 days, and the first year after exit. Each phase has a specific goal and five concrete actions. Built-in check-in questions at 30 and 90 days prompt you to assess what has shifted and what has not. The Red Flag Checklist is an early-warning system: 20 signals across five categories—Interview, First 90 Days, Communication, Conflict, and Culture—that screen any new environment for the patterns you just left. Use it before you accept an offer. Use it again at 30, 60, and 90 days.
What you get:
- A three-phase recovery plan with phase-specific goals and actions
- 30-day and 90-day check-in reflection prompts
- A 20-signal Red Flag Checklist scored out of 40
- A Green, Yellow, and Red interpretation guide
- A Quarterly Checkpoint Tracker to monitor your new environment over time
Recovery is not automatic. It is a practice.
Designed for individual use.
Part of the RADAR Pathway™ Framework Toolkit · Stage 5 of 5: Recovery
All sales are final. For educational use only. Questions? info@molnarrc.com
The Complete Framework Toolkit
You already know something is wrong. It's harder to see where you are, what it costs, and what a realistic path forward looks like.
This toolkit is the self-guided foundation of the Dare to Succeed system. If you want expert facilitation through a specific stage, that is what the workshops are for. The cohort is the best option if you want a structured group that works through the entire pathway together. Dare to Succeed is the place to go if you want community and support throughout your journey. If you want to work directly with me on your specific situation, constraints, and decisions, that is coaching. This is where most people begin.
Over two decades, I have surveyed and interviewed hundreds of professionals navigating toxic workplaces. The ones who moved well were the ones who could finally see their situation clearly and had a structured path to work from.
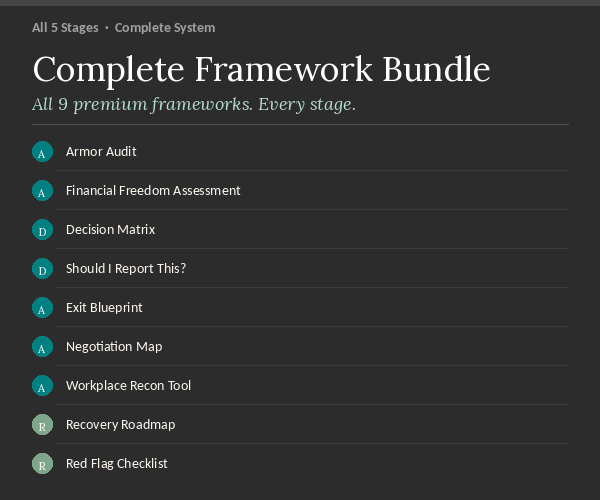
The Complete Framework Toolkit contains all five stages of the RADAR Pathway: 12 research-backed tools that take you from naming what is happening to mapping your recovery.
Stage 1: Recognition. Three tools to identify the behavioral patterns present in your workplace. Not a quiz. A structured diagnostic built from 14 documented patterns and 8 behavioral cycles across hundreds of professionals.
Stage 2: Assessment. Two tools are needed for the work that must be done before any decision can be made. The Financial Freedom Assessment builds your real numbers. The Armor Audit maps the survival behaviors you have built, what they are costing you, and which ones to keep.
Stage 3: Decision. A structured Decision Matrix for the moment when you can see the situation clearly but cannot make the call. It does not decide for you. It organizes what you already know into a form you can act on.
Stage 4: Action. A four-phase Exit Blueprint for building the conditions to leave on your terms. Consider the timeline, financial runway, professional positioning, and the threshold that indicates when to execute.
Stage 5: Recovery. A Recovery Roadmap for after. What comes off? What gets rebuilt? What to watch for.
$97. Individual stages start at $17 if you want to begin with one.
No results match your search. Try removing a few filters.